|
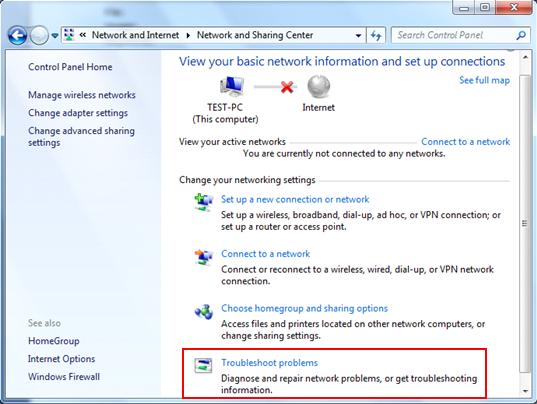
Network Troubleshooting in Windows 7Let’s explore network troubleshooting in Windows 7 here! This is built-in feature in Windows 7 that assists you to troubleshoot and resolve Internet connection, network adapter, file sharing, printing or other network related problems. It’s kind of helpful especially if you don’t have much networking knowledge, so you should try to use this tool when you face network problem next time. 1) First, open Control Panel and click on View network status and task in order to open Network and Sharing Center. 2) Network and Sharing Center will appear, scroll down and click on Troubleshoot problems.
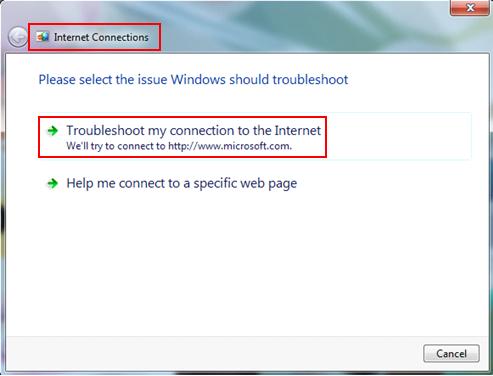
3) Ok, here you will be shown several options in order to troubleshoot network related problems, here is brief explanation. If not too sure which option to use, you can always try different options in order to find out the root cause and fix the problem. Internet Connections – Is your computer fails connecting to Internet or particular website? If your answer is Yes, use this network troubleshooting option!
Example 1:1) You computer is not connected to network (wireless or wired), and so you have no Internet access. You can then click on Internet Connections option to perform this network troubleshooting, proceed to click Troubleshoot my connection to the Internet.
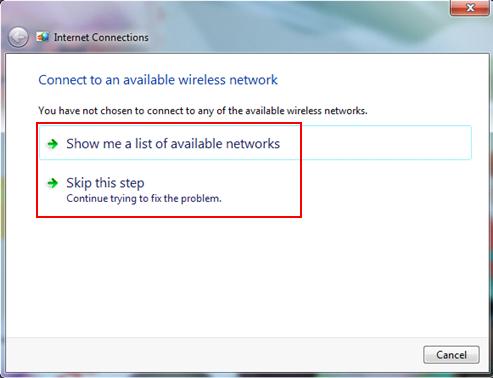
2) It will then check the network configuration on computer, try to detect problem and prompt you for connecting to available wireless network if there is wireless adapter installed on your computer. You should then click Show me a list of available networks and then proceed to connect to wireless network and this problem is resolved, however if you do not want to connect to wireless network, click Skip this step.
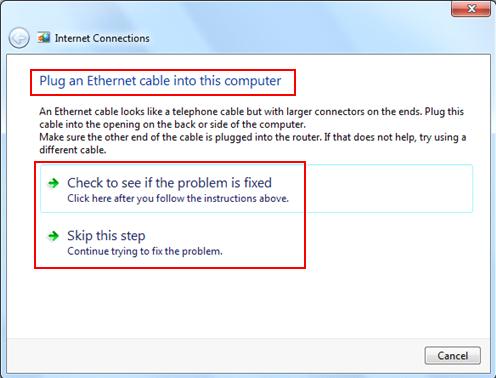
3) The troubleshooter continues to check and prompt you for connecting network cable to computer’s network adapter in order to connect to wired network. If you have wired network, then you should follow the advice here to resolve the problem. If it’s not resolved yet, you can skip and continue to troubleshoot the problem.
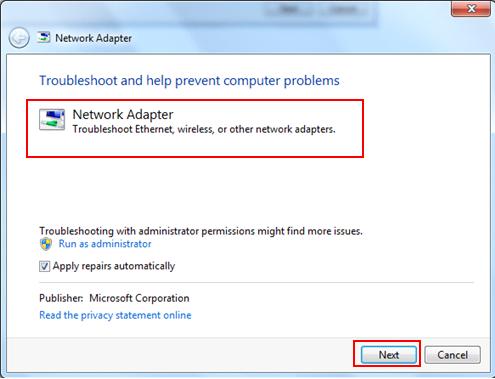
Example 2:1) Here is another example, let say you suspect there is problem on wireless adapter and so you use that Network Adapter option to try locating the problem.
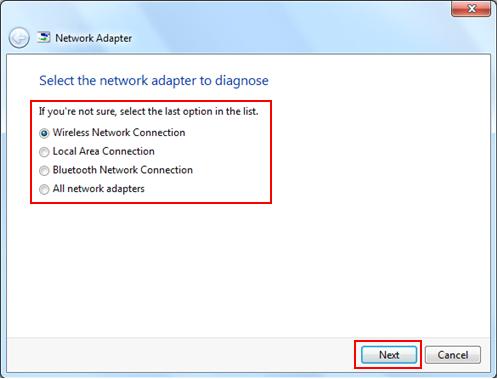
2) It will then trying to detect the problem, but you need to choose which network adapter you want to troubleshoot, we choose Wireless Network Connection in this case, click Next.
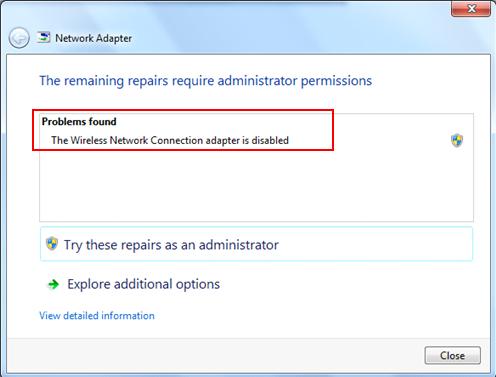
3) Wow! The troubleshooter continues to check and it detects the root cause, the wireless adapter is disabled, so it won’t be able to connect to any wireless network. Don’t wait anymore, you should then enable wireless adapter and try connecting to wireless network.
Other Articles: Using Ping to Troubleshoot Network Problem
|