Windows 10 Wireless Adapter Configuration
Windows 10 wireless adapter configuration is pretty easy to do! Mainly you want to perform this configuration in order to connect to wireless network, so that to connect to other computers on the network, access cloud storage, watch online movie, browse facebook or perform other online activities.Likely you have done some network related configutaions during the Windows 10 installation, but let’s go through them to ensure that you have configured it correctly in order to connect to wireless network.
Wireless Adapter Driver Status and TCP/IP Setting
The fist step is to ensure you have installed the wireless adapter driver correctly and it works well, else it won’t work even after you have completed other remaining steps. If your computer is not equipped with wireless adpater, then you can get one of those wireless adapters as shown hereAfter checking the wireless adapter driver status, you need to check and configure TCP/IP setting on the wireless adapter with IP address, subnet mask, gateway and DNS, so that it can connect to the wireless network without problem. This can be done manually or automatically (obtain network settings from DHCP server).
Note: If you are using laptop with built-in wireless adapter, make sure you have activated the wireless adapter by turning on the wireless button, press Alt+F2 or other keys on the laptop. Read the laptop manual to learn more as needed.
WLAN AutoConfig Service in Windows 10
Ok! Here you need to make sure WLAN AutoConfig service is running without problem! This is default Windows wireless utility for detecting wireless network and managing different wireless network profiles.Please set this service to start automatically whenever you boot up the computer, and you can check out here on how to do it if need help.
Let’s Connect to Wireless Network
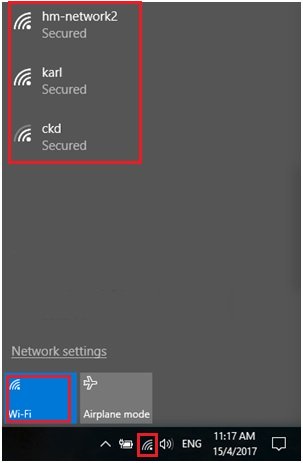
Ok! We are now ready to conect to wireless network. You can click on network icon in Windows 10 to detect available wireless network and connect to it. You need to key in the network security key if you connect to secured wireless network. Feel free to take a look on this connecting to wireless network article for more ideas.
After connecting to wireless network, you should also assign the computer name and workgroup to your computer as shown here if you have not done yet, so that it can be recognized easily in the connected network.
You can also go ahead to enable network discovery to discover other connected computers if you are on the home secured wireless network.
Go ahead to test the access to network and Internet, see if it works. If you face problem, try to use of this ping tool to do troubleshooting. That's it the Windows 10 wireless adapter configuration.
Next: Wireless Network Security
Content: What is Wireless Network
Back: Wireless Router Configuration
Return to top of "Windows 10 Wireless Adapter Configuration"!!


