|

Custom Search
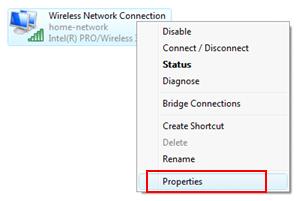
Password Protected File Sharing in Windows VistaIn case you do not wish to let everybody to access shared folder, you need to implement password protected file sharing in Windows Vista This type of file sharing is easier to set up now as comparing to Windows XP. Check out following steps to implement password protected file sharing. 1) First you need to confirm that you have enabled file and printer sharing on network card. Go to Start and right click on Network and then click Properties. 2) Network and Sharing Center window will appear, then click Manage network connections on the left panel. 3) Network Connections window will appear. Here you can right click on the network card that you are using now and click Properties.
4) Your network connection card’s properties window will appear, then click File and Printer Sharing for Microsoft Networks, finally click OK.
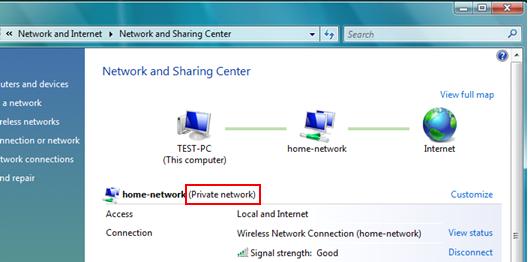
5) Now go back to Network and Sharing Center window, check the network location type of your computer. I would advise you to use Private network since you are using file sharing in home network. If your network location type is Public, check here on how to change network location type. Note: Also I would advise you to set the same Workgroup name for all computers in the same network. This is the short help on how to set computer name and workgroup in Windows Vista.
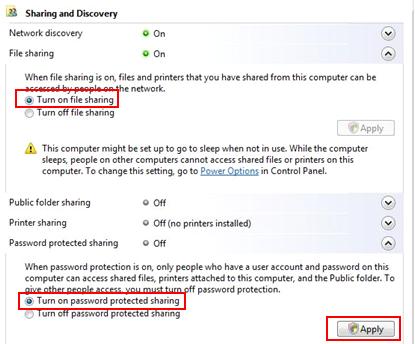
6) After that scroll down to the Sharing and Discovery section, turn on file sharing and also turn on password protected sharing. Click Apply to make changes, finally click OK to close all windows. Note: If you do not turn on password protected sharing, you only enable simple file sharing.
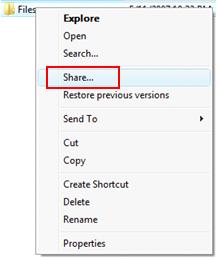
7) Password protected file sharing? Lets start to do it! Lets move to do folder/file sharing now. Go to the folder that contains the files you would like to share, right click that folder and click on Share… Note: You can also do password protected file sharing if you right click the folder and click Properties. I will tell you more about this advanced file sharing later.
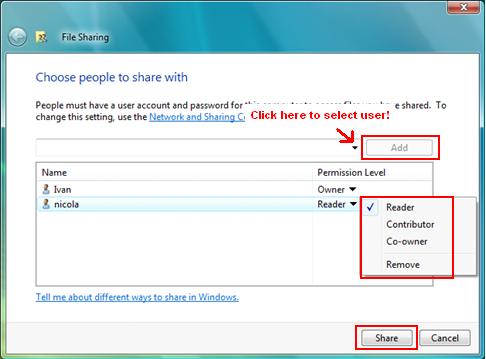
8) File Sharing window will appear. Since you have enabled password protected sharing, select the user that you wish to share folder/file with and click Add. In this case, I added user Nicola and then set the user permission. Finally click Share to do sharing. Note: For setting file permissions, you can have these 3 selection, choose the one that you need: Reader – Can only view or read files in the shared folder.
Note: Only enable file sharing with read, modify and write permission if you really need to. If not, Read only permission is enough.
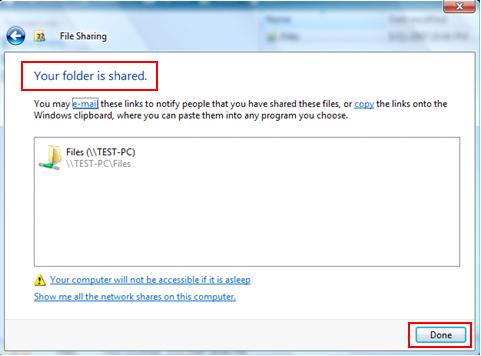
9) The next window will tell you that your folder is shared, click Done to close the window. Password protected file sharing is done!
10) After that when you check on the shared folder, you will notice there are 2 people on the bottom of folder.
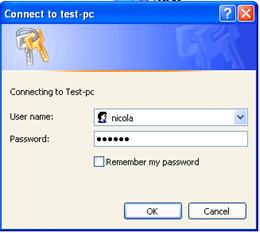
11) When you access this password protected shared folder from Vista, XP or other Windows OS, you will be prompted to key in username and password. Here I key in user Nicola and her password to access this folder from other XP computer. Note: Not like password protected file sharing in XP, Nicola can now login other computers with other username and password (example with username nicola123 and password), then can access this shared folder with username nicola.
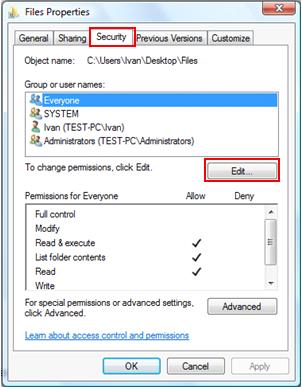
Note: Please right click that shared folder and click on Properties, then go to Sharing tab. Check the group or user names that are allowed to access this folder, and make sure the user/group that you allowed to access during sharing process is listed here as well (usually will be added automatically when you do folder sharing), if not click Edit to add those missing user/group. Please note Everyone will allow everybody to access this folder. If the specific user/group you allowed during sharing process does not match the user/group listed here, the missing user might not be able to see that shared folder at all! Or the user will get prompt saying that you might not have permission to use this network resource when try to access this shared folder from other computer. Try and test some different settings, then you will know which one will work. Have fun!
Related Articles:
Return to top of "Password Protected File Sharing in Windows Vista"!! |