|

Custom Search
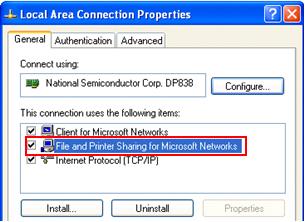
How to Share File with Group and User Permissions in Windows XPSometimes you might find out there is no group and user permissions control when you share file or folder in Windows XP. Did you know why?? It’s because you use default simple file sharing, that way you don’t have user or group permissions control. Below are step-by-step instructions on showing you how to share file and folder with group and user permissions in home network. Please note it only apply to Windows XP Professional Edition, you won’t be able to apply following steps if you are using Windows XP Home Edition. XP home edition users can only use simple file sharing. Note: Make sure you've enabled File and Printer Sharing for Microsoft Networks on network card's properties, if not you won't be able to share file or printer.
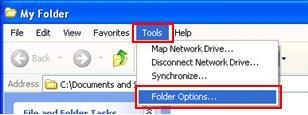
1) Open the folder which you plan to share, go to Tools and click Folder Options.
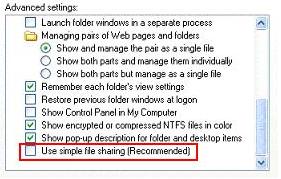
2) Folder Options window will appear. Click View tab, scroll down in Advanced settings section and uncheck Use simple file sharing. Click OK at last. Note: Simple file sharing is enabled by default in Windows XP’s computer that is not part of Active Directory. It won’t work for those Active Directory users or computers.
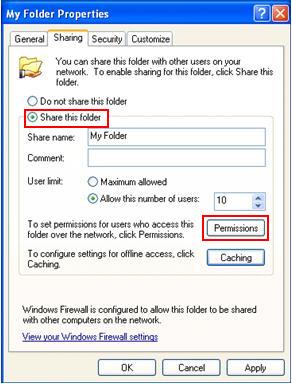
3) Now Right click the folder and click Sharing and Security. 4) Your folder properties window will appear. Click Share this folder and proceed to change the quantity of users that allowed to connect to this shared folder at the same time. You can also change the shared folder name. Later click Permissions button.
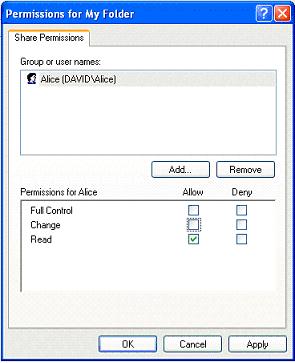
5) Folder Permissions window will appear. Here is the place where you set the users or groups that can access this shared folder over the network. In this case, I only allow Alice to access this folder with read permission. Click OK at last. Note: Alice must login using username Alice and Alice’s password when she tries to access this folder from other computers that runs Windows 2000, XP, Vista, 7 or other newer Windows OS. She also needs to login Windows 95/98/Me on other computers with the same username and password that set on this computer in order to access that shared folder. Note: Remember to remove Everyone from accessing this folder unless it’s really needed.
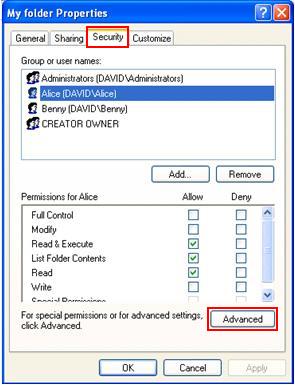
6) Ok.. Back to your shared folder properties, select Security tab and here you can set the permissions for allowing the users and groups to access this folder from this computer. Here I only allow Administrators, my username Benny, creator owner and Alice (read permission only) to access this folder. Click OK at last Note: You only able to set these permissions on local computer if you are using NTFS file system. This local security feature is available on every folder and file even you don't share them.
Note: Please be noted that the shared folder might inherits permissions from parent folder. Click Advanced button and uncheck folder inheritance, after that you can only remove those permissions that inherits from parent folder. Check out here to learn more on folder inheritance.
7) Once you have shared the folder, you will see there is a hand supporting your folder. You have successfully shared your folder. Finally you can share files by putting them into this folder.
Related Readings: How to Find Other Computer's Shared Folder and File in Windows XP
-> back to top of "How to Share File with Group and User Permissions in Windows XP" |