|

Custom Search
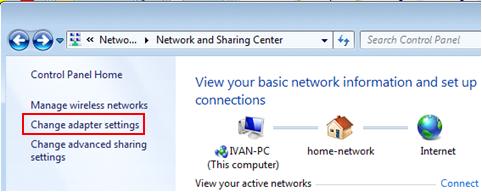
How to Disable IPv6 in Windows 7How to disable IPv6 in Windows 7, the feature which is enabled by default? Most of the Windows users might ask this question as this IPv6 feature is not popular yet and not in used by most of the users. Disabling this feature can also conserve Windows’ CPU and memory resources, however if you are going to use this computer to create or join homegroup, this feature cannot be disabled as it's required for homegroup activity. So... How to do it if you are interested? Well... The process to disable this feature is the same as what you do in Windows Vista, and I will briefly explain here: 1) Go to Start -> click on Control Panel -> click on View network status and tasks in Control Panel window -> click on change adapter settings in Network and Sharing Center window.
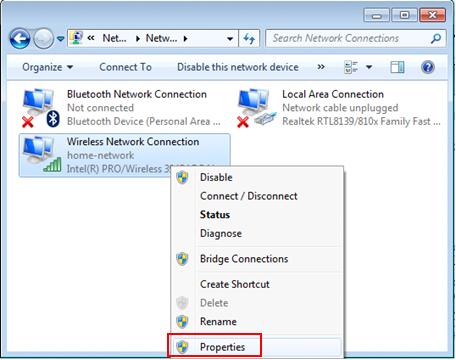
2) Network Connections window will appear. Here you right click on the network adapter (can be wireless adapter or wired Ethernet adapter) that you wish to disable IPv6 and click Properties.
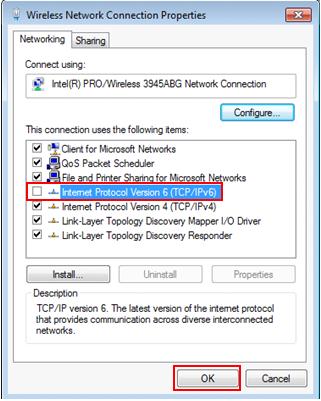
3) In the network adapter properties window, untick Internet Protocol Version 6 (TCP/IPv6) and click OK. Repeat the same process on other network adapters if you want. Note: This method disables IPv6 on your LAN interfaces and connections, but does not disable IPv6 on tunnel interfaces or the IPv6 loopback interface. You need to make change in Windows registry in order to disable the IPv6 on tunnel interfaces. You can stop here if don’t feel like working with Windows registry. If not, continue your reading.
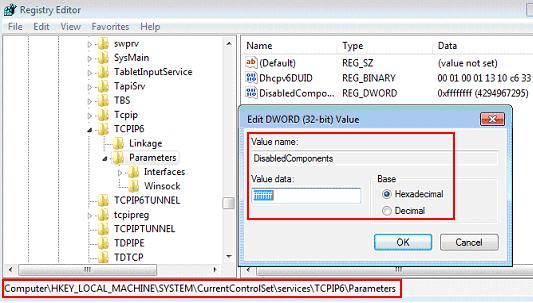
4) Type regedit in command prompt to launch registry editor, proceed to locate following registry item in Registry editor. HKEY_LOCAL_MACHINE\SYSTEM\CurrentControlSet\Services\Tcpip6\Parameters\DisabledComponents 5) If the DisabledComponents item is unavailable, you must create it in following format by going to Edit -> New -> DWORD (32-bit) Value and set the value to 0xffffffff (just type ffffffff). This will disable all IPv6 features except the IPv6 loopback interface, finally click OK and restart computer.
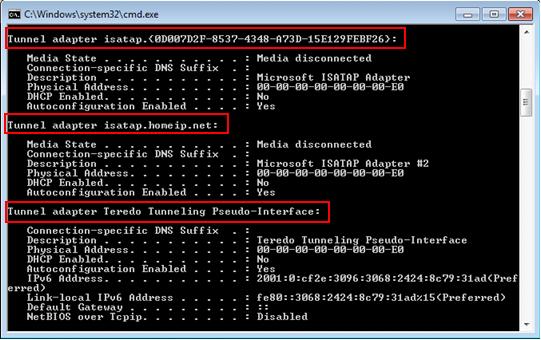
Note: Once you have restarted computer, the following IPv6 tunnel interfaces will be disabled and removed.
Other Articles: How to Connect to Wireless Network in Windows 7
|
Would you prefer to share this page with others by linking to it?