Deleting Wireless Network Profile in Windows 8
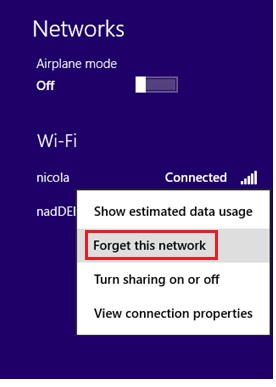
Deleting wireless network profile is simple and easy in Windows 8!Sometimes you need to delete this wireless network profile if you face the problem for connecting to wireless network due to wireless network settings mismatch issue, most likely after doing some wireless network settings changes on wireless router.
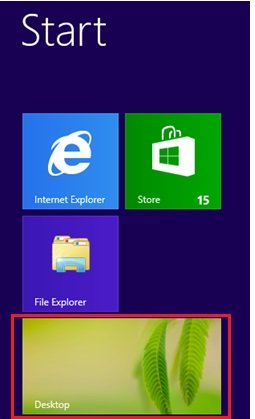
1) Click Desktop tile on Start screen in order to go to Windows desktop environment that you are familiar with.


Note: Please be aware that only those wireless networks that you have connected before could have the profile created and allow you to delete it this way.


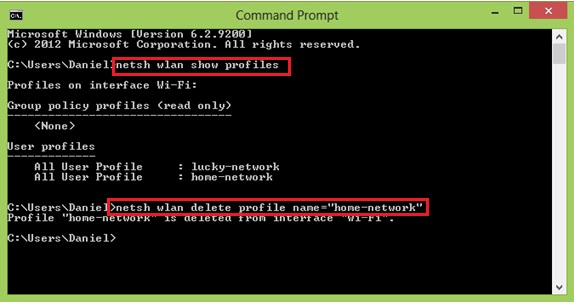
netsh wlan show profiles - This command will show all wireless network profiles saved on you computer, even those old wireless network profiles which are not detected by your computer now.
netsh wlan delete profile name="wireless-network-profile-name" – Use this command to delete wireless network profile.
That’s it! Hope you enjoy reading this article!

Quick Way for Connecting to Wireless Network in Windows 8
Easy Way to Check Computer Security Status in Microsoft Windows
Using Ping Tool to Troubleshoot Wireless Network Problem
Return to top of "Deleting Wireless Network Profile in Windows 8"!!


Would you prefer to share this page with others by linking to it?