|
Changing the Speed and Duplex Mode of Network Card in Microsoft WindowsSometimes you might want to check or change the speed and duplex mode of network card
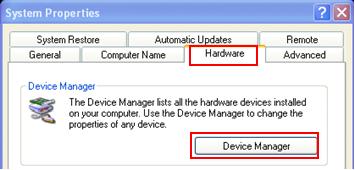
Here is simple instruction on how to do it in Microsoft Windows: 1) Open Windows Explorer, right click My computer and click on Properties. 2) System Properties window will appear, click on Hardware tab and then click Device Manager. Note: Of course you can always use different methods to open this Device Manager.
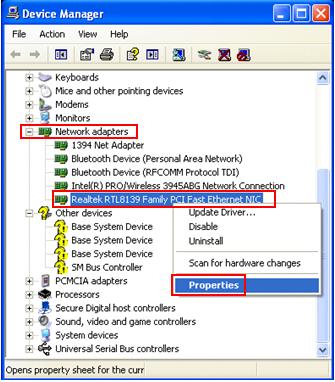
3) Expand Network adapters’ entry in Device Manager window, right click the network card that you want to change speed/duplex setting and click Properties.
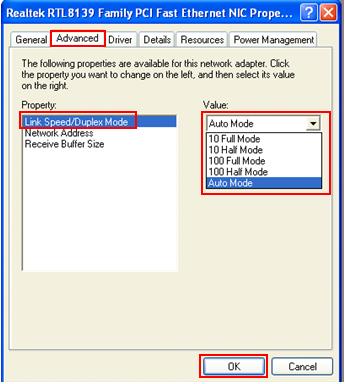
4) Go to Advanced tab of network card’s properties window, here you can locate the entry to check or change the speed/duplex setting, normally it can be Speed & Duplex, Link Speed & Duplex, Link Speed/Duplex Mode, etc. You can proceed to change the setting to Auto or other specific speed/duplex mode (10Mbps full duplex, 100Mbps half duplex, 1000Mbps half duplex, etc). Finally click OK and close all windows. Note: Most of the time the network card should work well by having auto, auto mode or auto negotiation setting, but sometimes it can cause slow network or Internet access problem. If you know the speed/duplex mode of connected router/switches, you can set to specific speed/duplex setting and test it. If not sure, test on all different settings.
Related Articles: Using Ping to Troubleshoot Network Problem
Return to top of "Changing the Speed and Duplex Mode of Network Card in Microsoft Windows"!! |