|
Printer and File Sharing on Remote Desktop ConnectionIf you need to enable printer and file sharing on remote desktop connection, just enable the following simple options on remote desktop client before connecting to remote computer, after that the local drives will be mapped on remote computer, and you can access to shared file or printer.
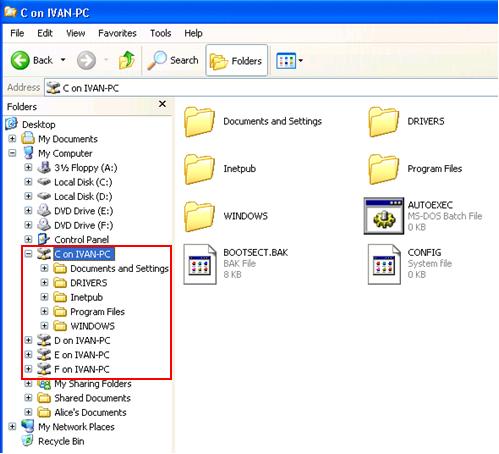
Here is an example, my C, D, E, F local drives are mapped on remote computer, so it’s easy for me to transfer files between local and remote computers.
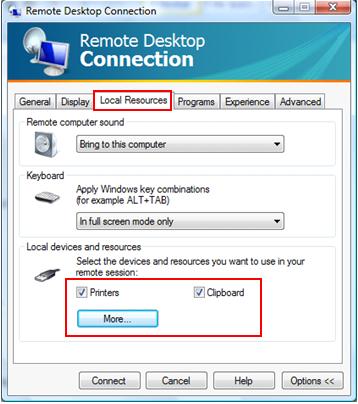
Here I will show you how to do it in different Microsoft Windows editions: Let say you are user that uses Windows Vista with SP1, you can go to Start -> All Programs -> Accessories and click on Remote Desktop Connection, the remote desktop client will appear, click Options button to show you more options, then click Local Resources tab, you can then tick Printers and Clipboard to use them on remote computer. If you want to share local drive, click More… button.
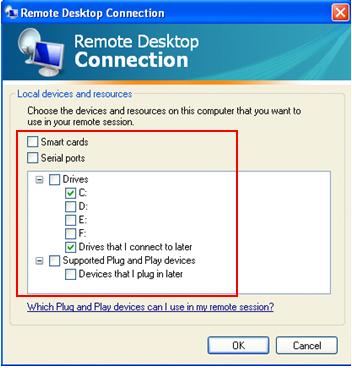
A new Remote Desktop client window will appear, and here you can tick on local drives or Drives that I connect to later (USB thumb drive, external hard disk, etc) to use on remote computer later. Please note you can also select Smart cards or Supported Plug and play devices options to be used on remote computer.
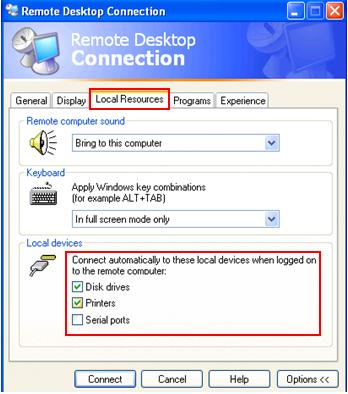
As for users with Windows XP SP2, go to Start -> All Programs -> Accessories -> Communications -> click Remote Desktop Connection, the remote desktop client will appear, click Options button to show you more options, then click Local Resources tab, you can then tick Disk drives and Printers and use them on remote computer.
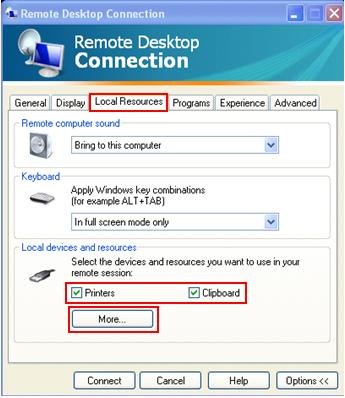
If you are using Windows XP with SP3, go to Start -> All Programs -> Accessories -> click Remote Desktop Connection, the remote desktop client will appear, click Options button to show you more options, then click Local Resources tab, you can then tick Printers and Clipboard to use them on remote computer. If you want to share local drive, click More… button. This window is different if you compare to XP with SP2, it’s similar to the one in Vista.
A new window will appear, and here you can tick on local drives or Drives that I connect to later (USB thumb drive, external hard disk, etc) to map on remote computer later. Please note you can also select Smart cards or Supported Plug and play devices options to be used on remote computer. Finally click OK and you are ready to establish the remote desktop connection.
Other Articles:
Return to top of "Printer and File Sharing on Remote Desktop Connection"!! |