|

Custom Search
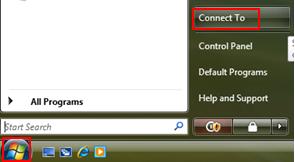
Using Windows Vista to Connect Wireless NetworkHa! Using Windows Vista to connect wireless network is getting easy and simple if you compare with Windows XP, so that you can connect to home wireless network or public network without more troubles. Also now Vista is capable to detect non-broadcasting wireless network (hidden SSID) and you can configure it as preferred network (this feature is not supported in Windows XP). Ok! Let’s start to do it! I would assume you already had wireless adapter and driver installed on Vista computer. 1) Go to Start and click on Connect to.
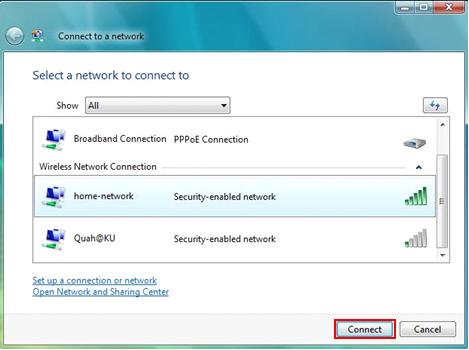
2) Connect to a network window will appear. This window will show all available connections, which are dial-up, VPN and wireless connections, but your focus is on wireless connections. Scroll down the list and select the wireless network that you wish to connect, finally click Connect button. Note: If the network you choose is security-enabled network, means require authentication. One of the following will occur: - If the network key is automatically provided by your network or system administrator (that is, the network supports IEEE 802.1x), the connection will be made automatically.
Note: If you see the network is tagged as unnamed network, that is non-broadcast network with hidden SSID. When you make connection to this type of network, you will be prompted to type the wireless network name (SSID). Note: If you did not find the wireless network which you wish to connect, you can connect manually by clicking on Set up a connection or network. I will explain this in details in other article later on.
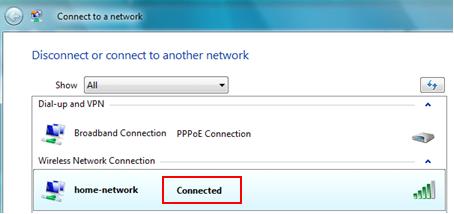
3) Once you connected to wireless network, the connection will show connected.
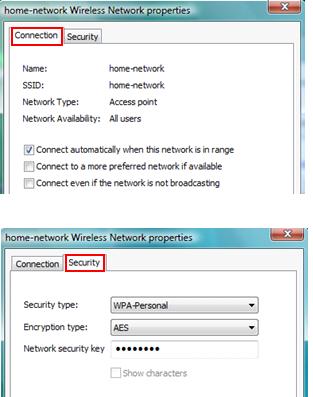
4) If you right click the connected wireless network and click properties, you will be able to see the connection setting of this network and make further configuration, such as set it as preferred network to connect automatically. Check through the setting and play with it. Have fun! :o)
Return to top of "Using Windows Vista to Connect Wireless Network"!! |


