|
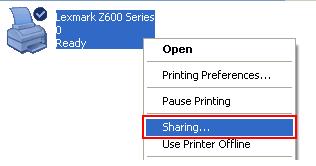
 Custom Search How to Share Printer in Windows XPFollow this step-by-step instructions to share printer in Windows XP. It's pretty simple task! 1) Go to Start and click Control Panel. Control Panel Window will appear, then double click Printers and faxes. 2) Printers and Faxes window will appear. Right click the printer you want to share, then click Sharing…
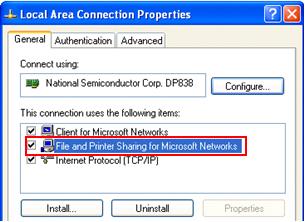
Note: Make sure you've enabled File and Printer Sharing for Microsoft Networks on network card's properties.
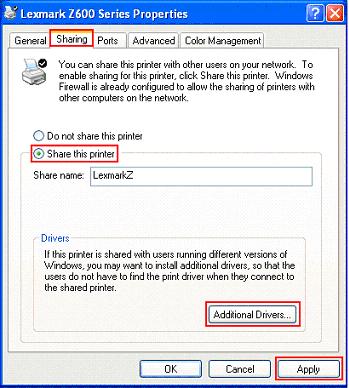
3) Select Sharing tab and tick Share this printer to share the printer. You can type in a new name in the Share name text box to change your printer name on the network, however this will not change the printer name on your computer. Click Apply.
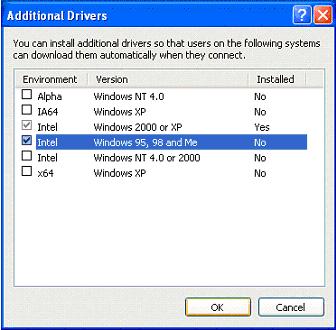
Note: If the other users using different version of Windows to access your printer, they will need to install printer driver themselves. You can help by installing additional printer drivers on your Windows XP, so that the printer driver will be installed when other users access the shared printer with different version of Windows. Click Additional Drivers, tick additional driver you would like to install. You will be prompted to install those additional drivers after clicking OK.
4) Once you have shared the printer, you will see there is a hand supporting your printer. You can share printer, and you can also share files. Check this out... |


Would you prefer to share this page with others by linking to it?