|
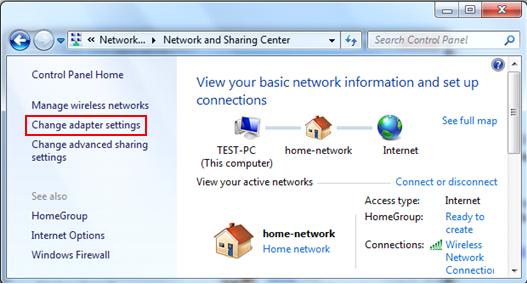
Public Folder Sharing in Windows 7Public folder sharing in Windows 7 is suitable for you if you wish to share files with many users on your computer or network quickly. This is one of many file or folder sharing methods that you can use in Windows 7. By default all users on same computer can access the public folders to share or read/write files, they're located in Windows directory->Users folder->Public folder, you can place the files in these public folders for sharing. However if you want to share these public folders with other computers on home network, you need to enable public folder sharing as shown below. 1) First you need to confirm that you have enabled file and printer sharing on network adapter, if not you will face problem later on. It’s not difficult to find out! Open Network and Sharing Center, after that click change adapter settings on left panel.
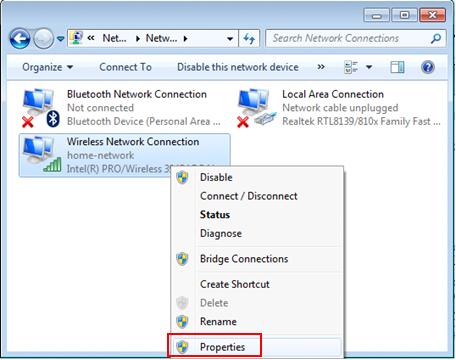
2) Network Connections window will appear. Here you can right click on network adapter (can be wireless adapter or wired Ethernet adapter) that you are using and click Properties.
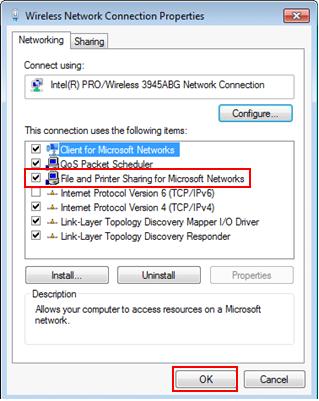
3) Your network adapter’s properties window will appear, then tick File and Printer Sharing for Microsoft Networks if it's not ticked, finally click OK.
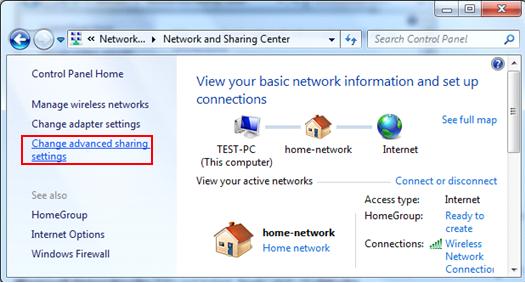
4) After you have done file sharing feature checking on network adapter, go back to Network and Sharing Center again, and here please take note on your network location type, after that click on change advanced sharing settings on left panel.
5) Once you have accessed to Advanced sharing settings window, click on following public folder sharing option under your network location type and save changes later. Turn on sharing so anyone with network access can read and write files in the Public folders Note: Please don’t enable public folder sharing if your network location type is Public. In this case, most likely your computer is connected to public network, and so it’s not suitable to enable this sharing as strangers who are connected to same network could access your folders too. Note: As I told you earlier, other people logged on to this computer can still access these folders if this sharing option is disabled.
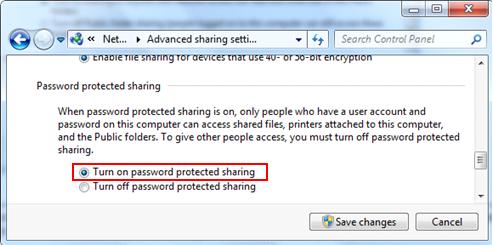
6) If you change your mind later and just want to share the documents to limited users only, you can always come back to this advanced sharing window by clicking on Turn on password protected sharing and save it. This will only allow those people with a user account and password on this computer to access this public folder after having successful user authentication.
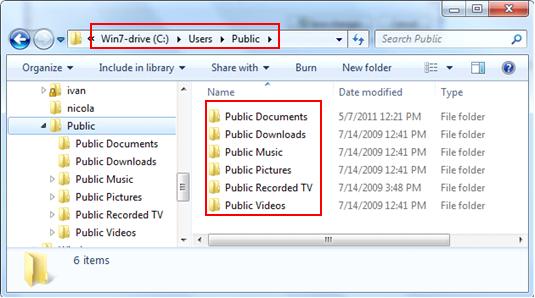
7) Ok, what's next? Well, you can go ahead to put in the files or folders in public folders which are located in Windows directory->Users folder->Public folder for sharing. That’s it! You have done! :)
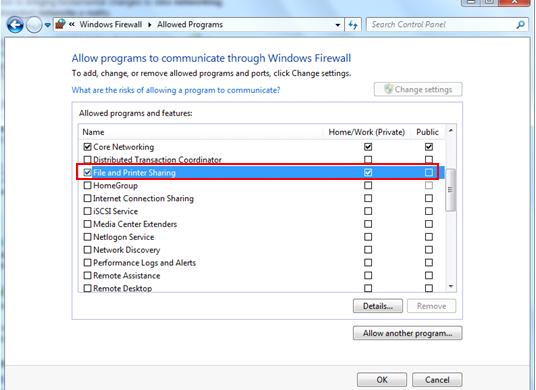
Note: If there is problem for other computer to access your public folder even if you have shared it correctly, check the Windows firewall settings if you have enabled this firewall and make sure you allow File and Printer Sharing to communicate through firewall as shown below. If you use other firewalls, you should enable file and printer sharing network traffic to pass through too.
Related Articles: Simple File Sharing in Windows 7
|