|

Custom Search
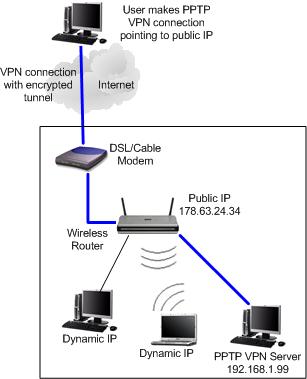
Simple PPTP VPN Server Setup in Windows XPDo you know that you can actually set up a simple PPTP VPN server in Windows XP, so that you can connect to it securely and access your home network resources when you away from home? You don’t need to buy expensive VPN gateway or server to get it done. Let’s take a look on the VPN network diagram below with typical home network setup, the Internet user can make a VPN connection over the internet by connecting to home network’s DSL/Cable Internet public WAN IP (178.63.24.34 in this example), then connects to home PPTP VPN server (please assign fixed IP to this server, I use 192.168.1.99 in this example). Once the VPN connection is up, the communication between the user computer and PPTP VPN server will be encrypted, so the hacker won’t be able to sniff the traffic. Ha! You can then access the shared files and other resources on this server.
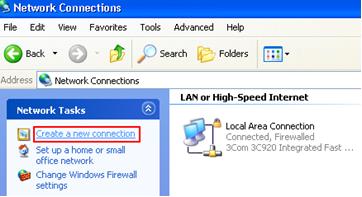
Here is how you configure this PPTP VPN server: 1) Go to Start and open Control Panel. 2) Control Panel window will open, then double click Network Connections icon to open it. 3) Click Create a new connection on Network Connections window.
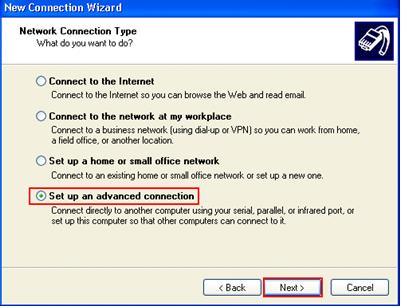
4) New Connection Wizard window will appear, click Next. 5) Select Set up an advanced connection option, then click Next.
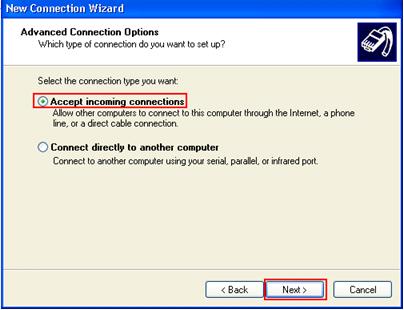
6) Select Accept Incoming Connections option and click Next.
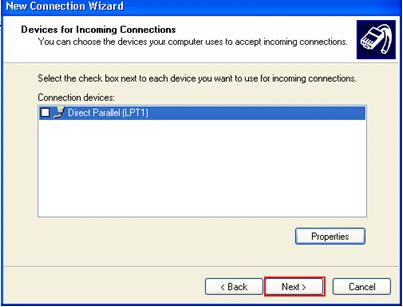
7) Please Ignore this Devices for Incoming Connections page, just click Next.
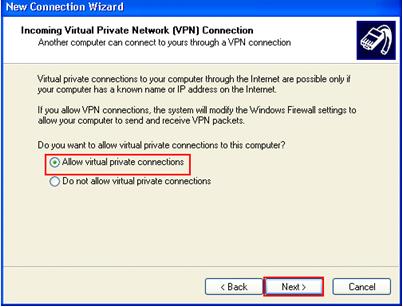
8) Select Allow virtual private connections option and click Next.
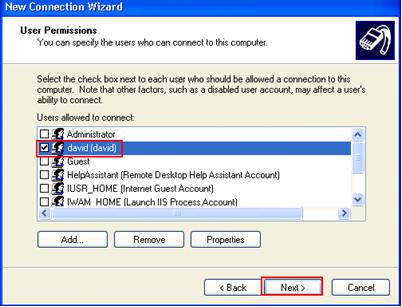
9) Then, select the user who should be allowed to connect to this VPN server. In this case, I select normal user David. Click Next at last. Note: Please only select the users that need to access this server to minimize security risk.
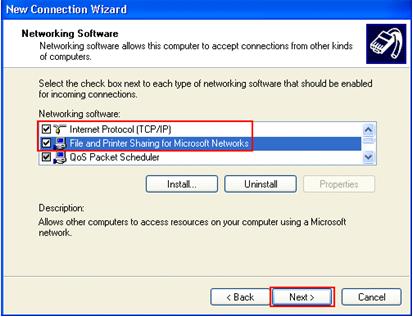
10) Ok.. On this Networking Software window, you must select Internet Protocol (TCP/IP) option. If you need to do file sharing after connecting to this server later, select File and Printer Sharing for Microsoft Networks option, then click Next.
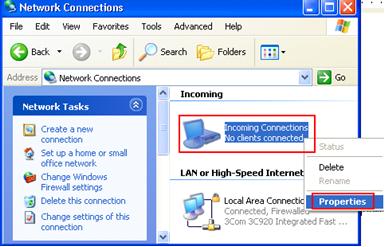
11) Click Finish to complete this VPN server setup process. 12) After that, you will see there is new Incoming Connections icon created in Network Connections window. You can still right click this icon and click on Properties to make changes on settings we have just configured.
Note: If there is user connected to this server, it would create a user icon.
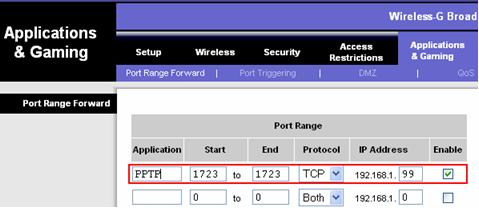
13) If you wish to connect to this VPN server from Internet by going through the router, then you need to enable port forwarding and allow PPTP passthrough options on the router. Note: Since PPTP VPN uses port TCP-1723, you need to do port forwarding on TCP-1723. If you have problem to do port forwarding, then take a look on this port forwarding how to article. In this example, my VPN server IP is 192.168.1.99, so I do port forwarding to this computer’s port TCP-1723 on router.
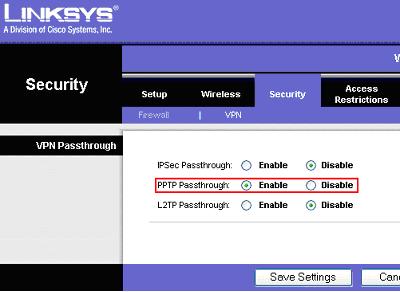
Note: Here is how I enabled PPTP Passthrough on Linksys router. Just go to your router management page to locate this option.
Related Articles: Virtual Private Network (VPN) Introduction
Return to top of "Simple PPTP VPN Server Setup in Windows XP"!! |
Would you prefer to share this page with others by linking to it?